DIY ORIGAMI FLOWERS
-
This shop has been compensated by Collective Bias, Inc. and its advertiser. All opinions are mine alone. #SienteGlade #CollectiveBias
I love mornings when I wake up with a little extra pep in my step! Don’t you?
As a typical Latina, I normally tend to be pretty cheery and bright. But I especially love it when even the littlest things add joy to my day. A hot cup of cafecito, fresh flowers, even a day filled with crafts…
Spring couldn’t have come soon enough! Maybe it’s the fact that I feel like a lot of good things are happening around me these days. I have friends that are getting married, some that are having babies and others that are coming to visit from out of town. But today, I need to get crafting. I decided to pass by my local Publix and browse the aisles for some inspiration.
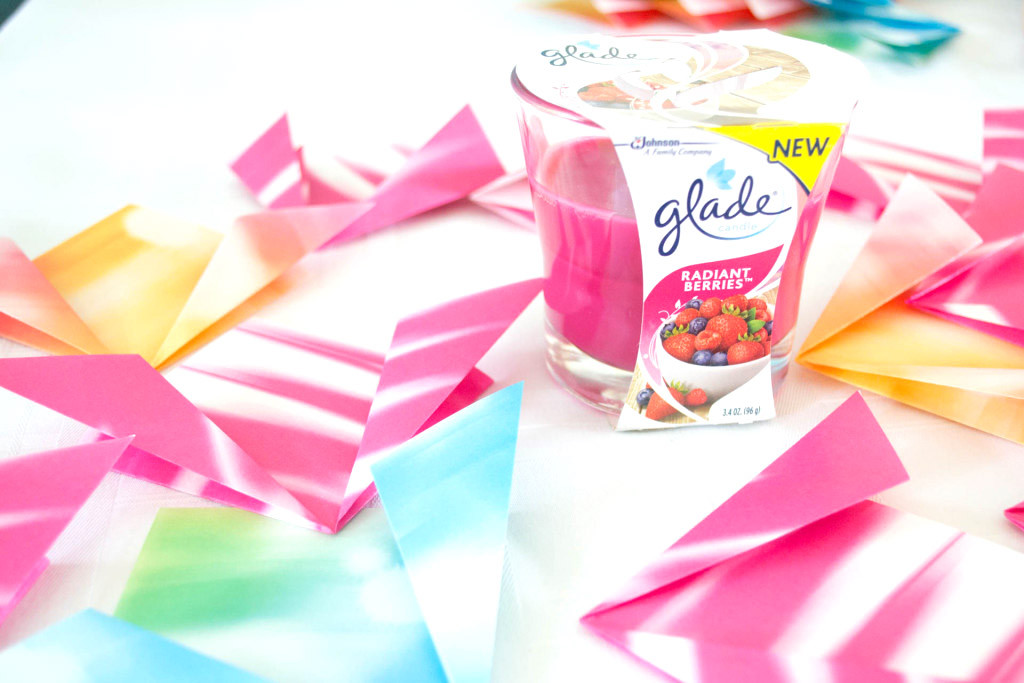
What better way to get my creative juices flowing than by trying out a new candle? I’m a strong believer that smells can either inhibit or enhance creativity. So, I decided to set the mood in my casita by adding a little brightness! I purchased a set of the new Glade® Radiant Berries™ Candles and decided to also give the Glade® Radiant Berries™ PlugIns® Scented Oil a try. (What can I say, I’m into smells.) And this scent was just the jolt of fun that I needed. The bright smell of berries made me think pink, spring, and cheery. I put on some good jams, phoned a friend, and got to crafting for an upcoming bridal shower!
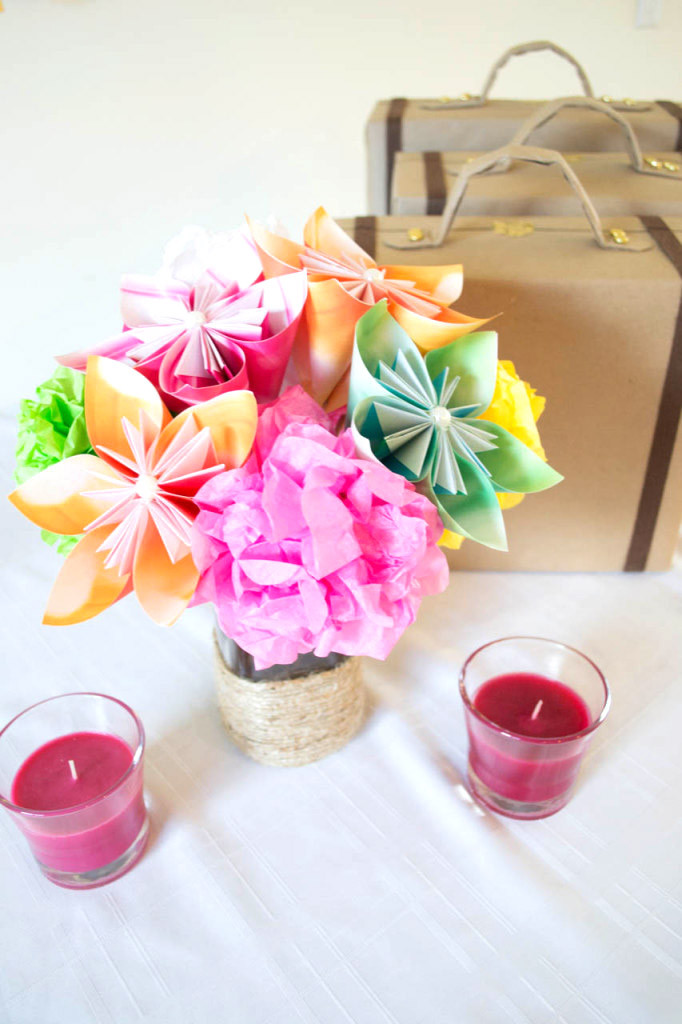
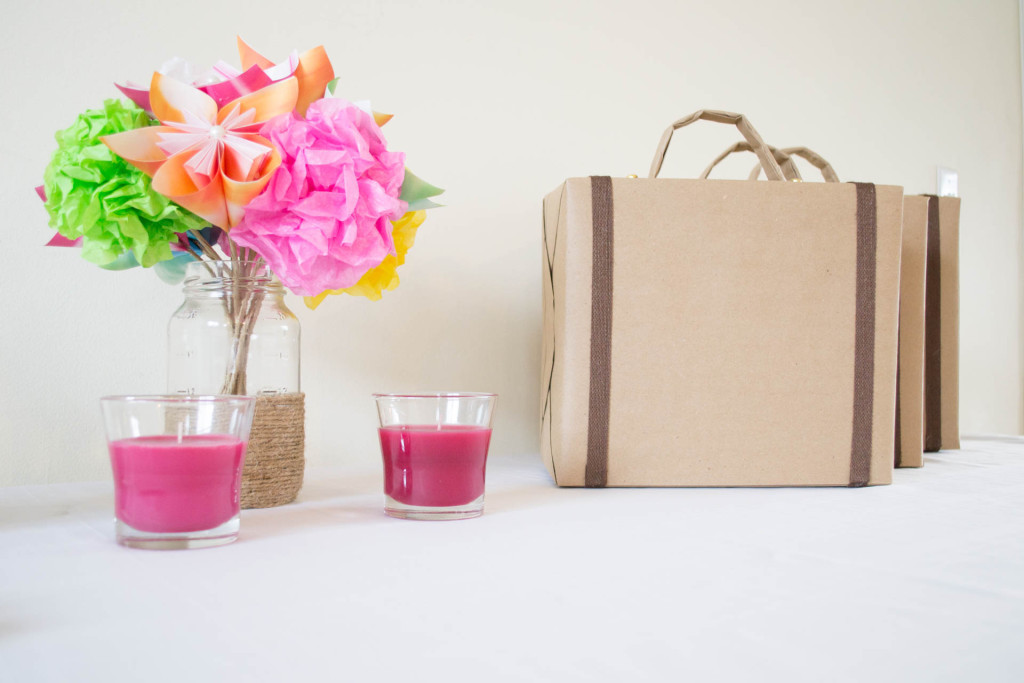
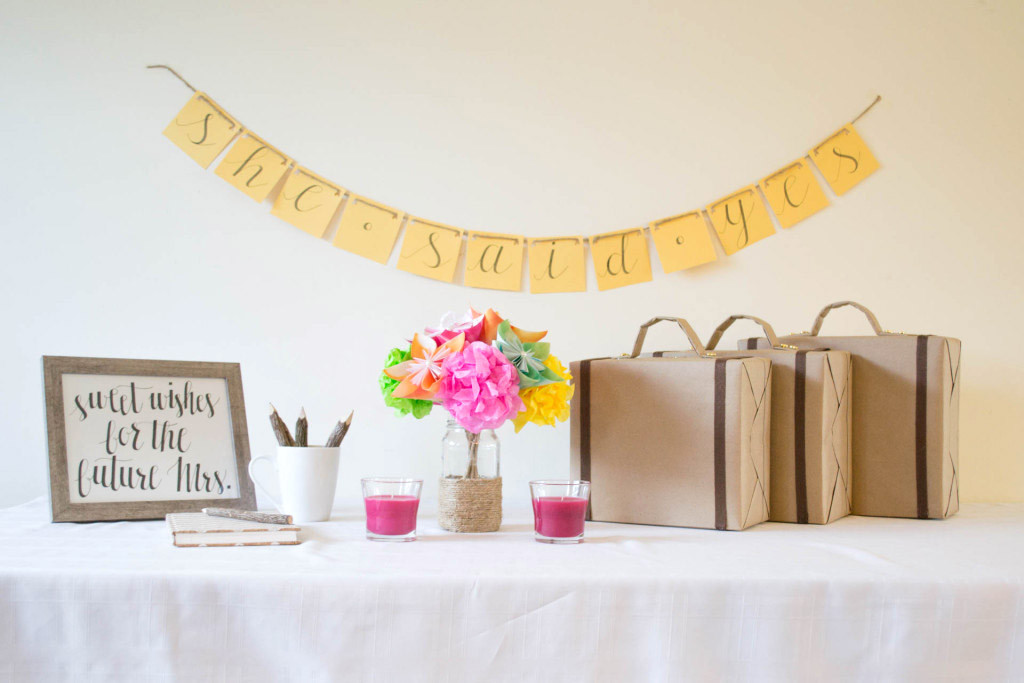
Today’s goal… Centerpieces. Origami and tissue paper flowers, coming right up!
Here’s what we’ll be making… Want to join in on the fun?
What you’ll need:
- Hot glue gun
- Hot glue gun sticks
- Origami papers
- Colored tissue papers
- Small pearls
- Twine
- Craft sticks or stems
- Mason jars
Let’s get started with the tissue paper flowers…
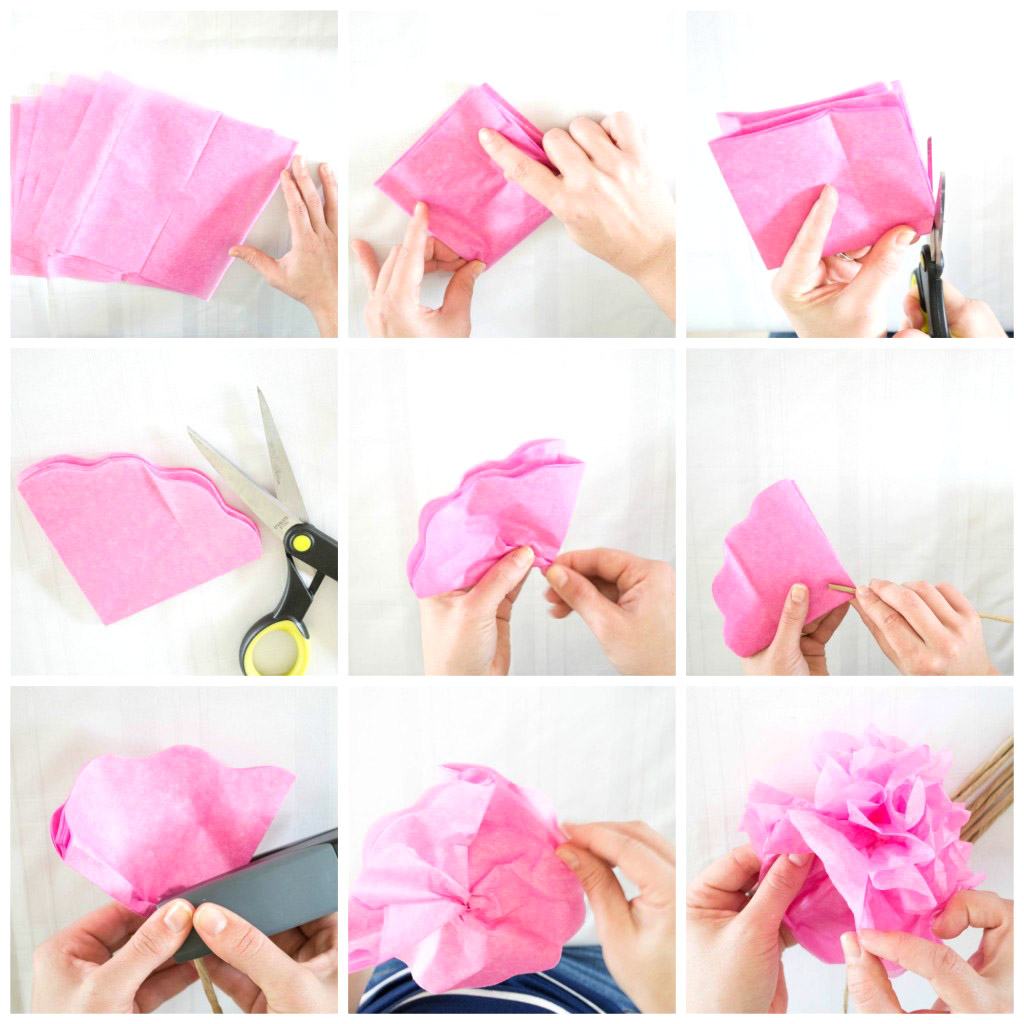
- Cut your tissue paper into large squares. Sizes can vary according to the size you want your flower to be.
- Stack them on top of each other. I used 5 sheets.
- Fold the squares in half, it should now look like a rectangle.
- Then, fold the rectangle again in half and it now becomes a square.
- Hold at the center and begin to cut/trim the edges of the flower.
- Once you’ve trimmed the edges, you can now staple or glue the stick/stem.
- I found that using a stapler is easier and doesn’t damage the paper as much.
- Slowly begin to unfold the scalloped edges into the center of the stem.
- Repeat the process and turn the flower as you go along.
- Voila!
Now, let’s use our origami paper and start making our kusudama flower.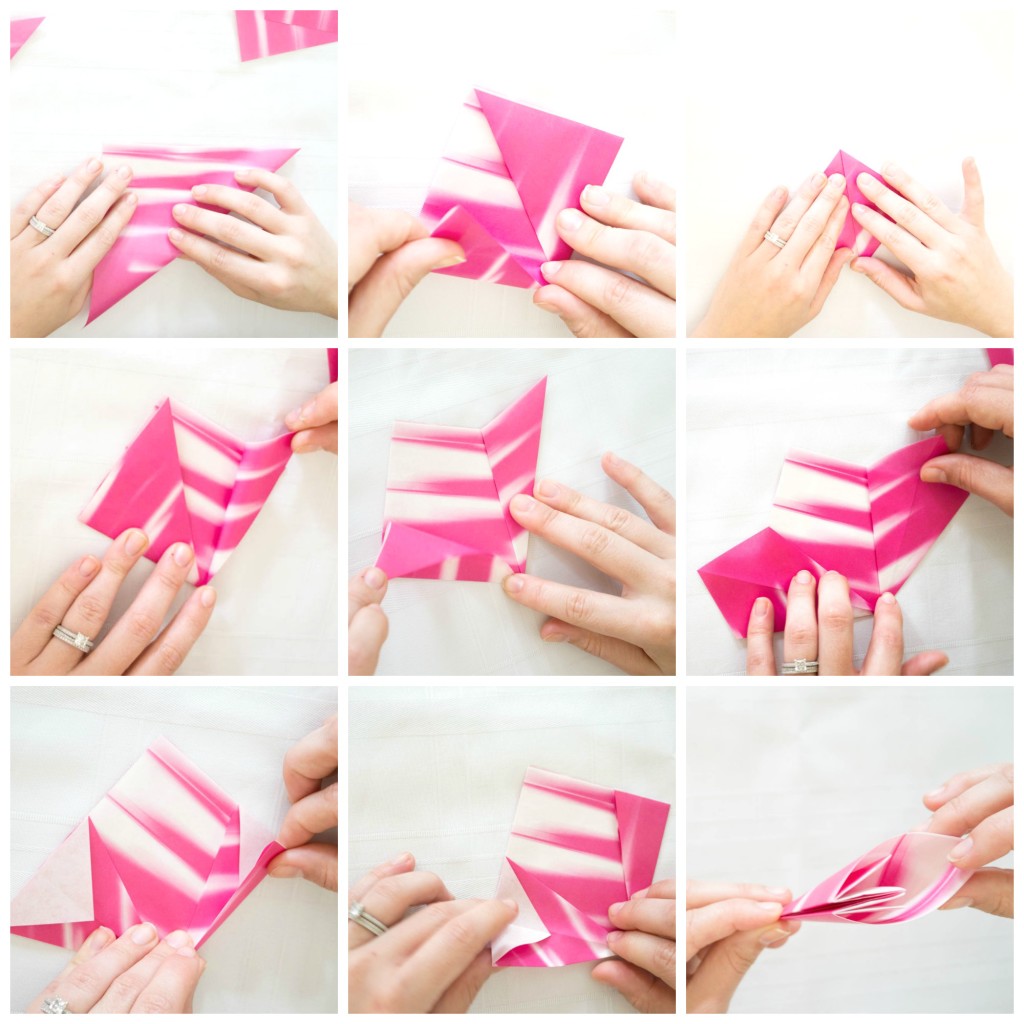
- Start with a squared piece of origami paper. (Not pictured above.)
- Fold the paper in half diagonally.
- Bring the bottom side triangles up to the center of the triangle.
- Now, bring the right flap and fold it in half toward the edges of the square.
- Repeat the process with the left flap folding it backwards and halfway.
- Expand the triangle you’ve just folded and slowly flatten it into a diamond-like shape. Be sure to do this on both sides.
- Fold the tips of the diamond into an upside-down triangle shape.
- Repeat on both sides.
- Fold both sides in, toward the line-fold in the center of the diamond.
- Hold at the tip and slowly curve the left and right-most corners — now you’ve got yourself a petal!
Now, how do we put them all together and make them look like this?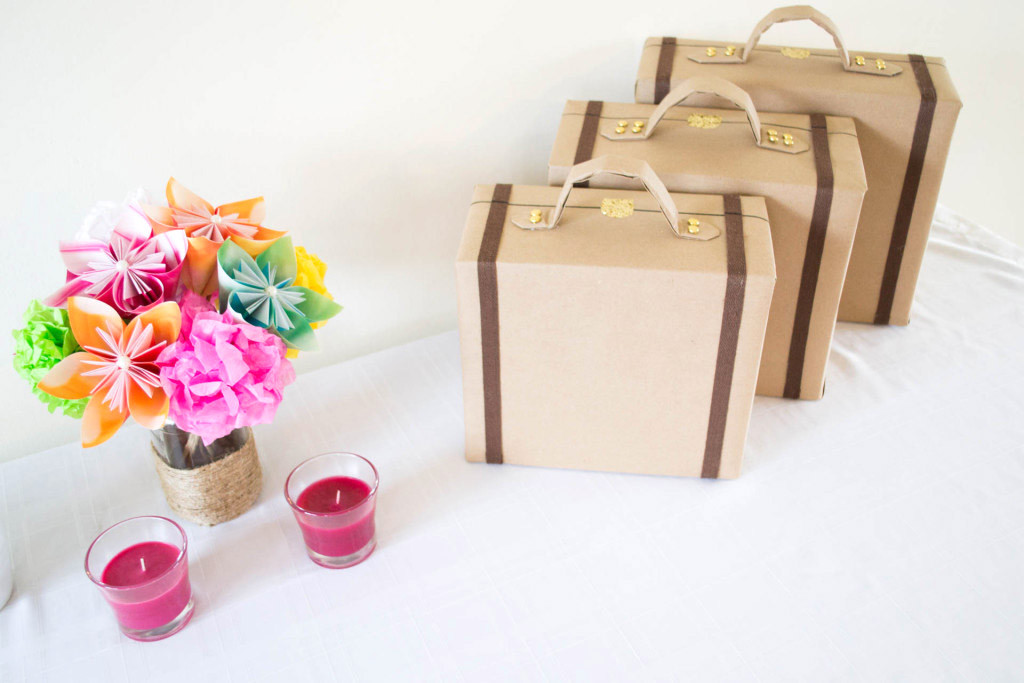
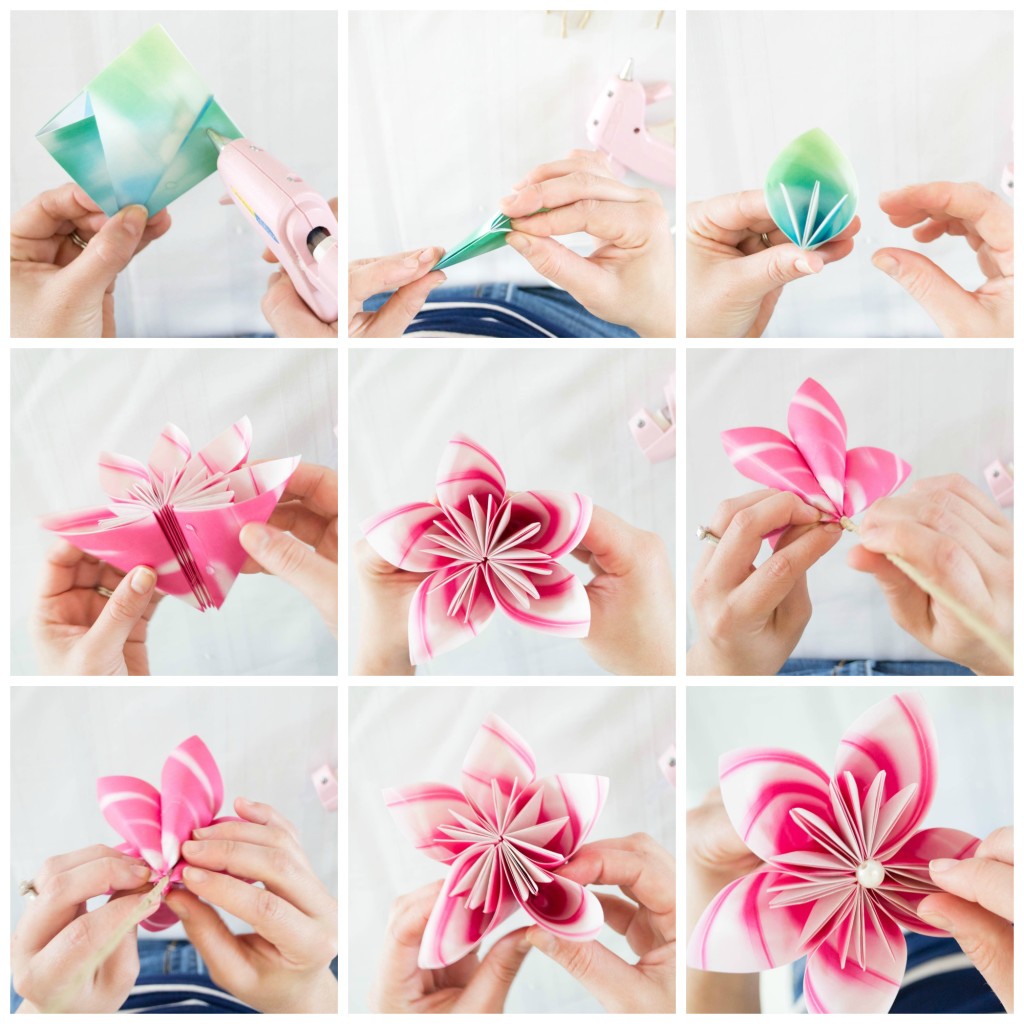
- Now that you’ve created all your petals, begin to glue the folded tabs.
- I used the hot glue gun and added three dots along the edges.
- Bring the folded flaps together and allow the glue to set.
- Hold the flaps closed for 5 seconds. Repeat the process on all other petals.
- Begin to add petals holding them in place as you glue others. I recommend at least 5 petals per flower.
- Continue adding pieces until you’ve assembled an entire flower.
- Apply glue to the central stem.
- Flip flower and insert the stem from the center-bottom of the flower.
- Add the last touch by gluing a small pearl at the center of your flower.
- All done! You’re flower is ready to go!
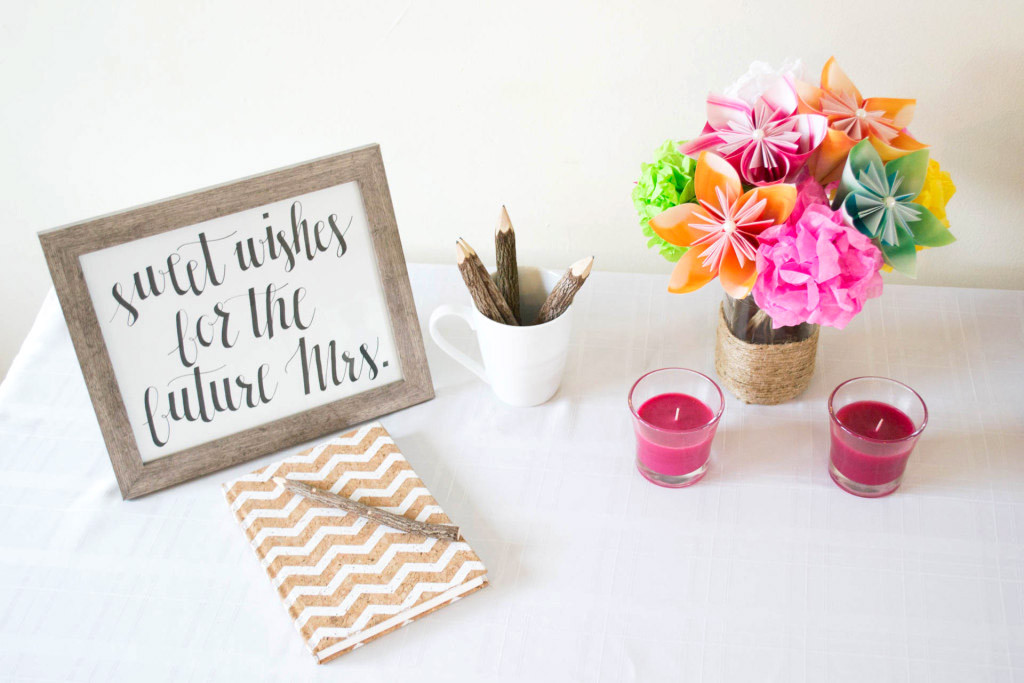
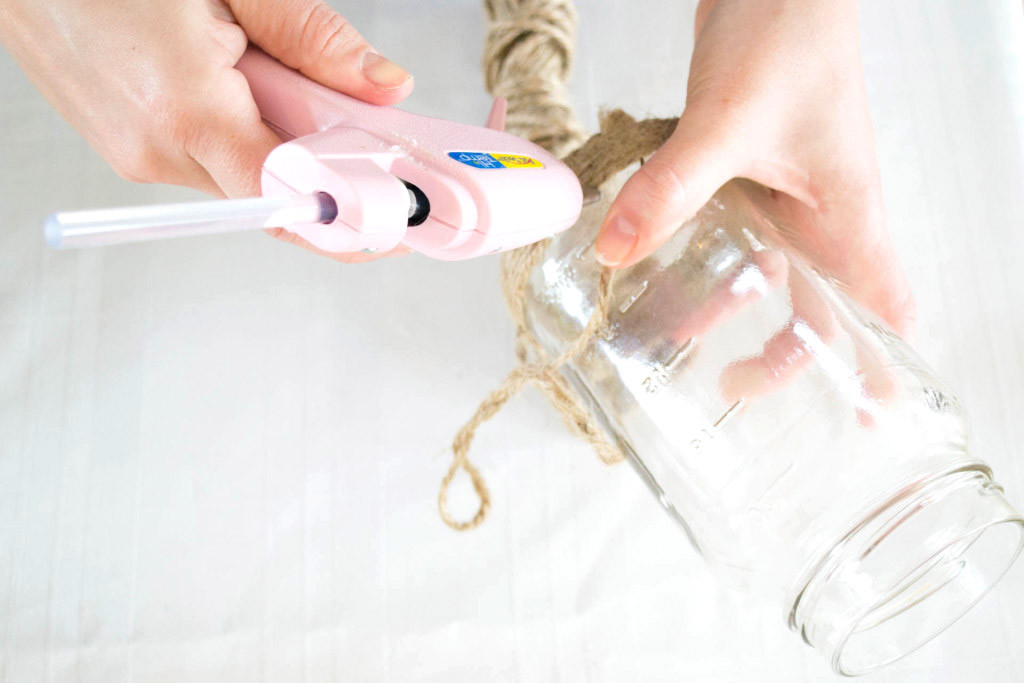
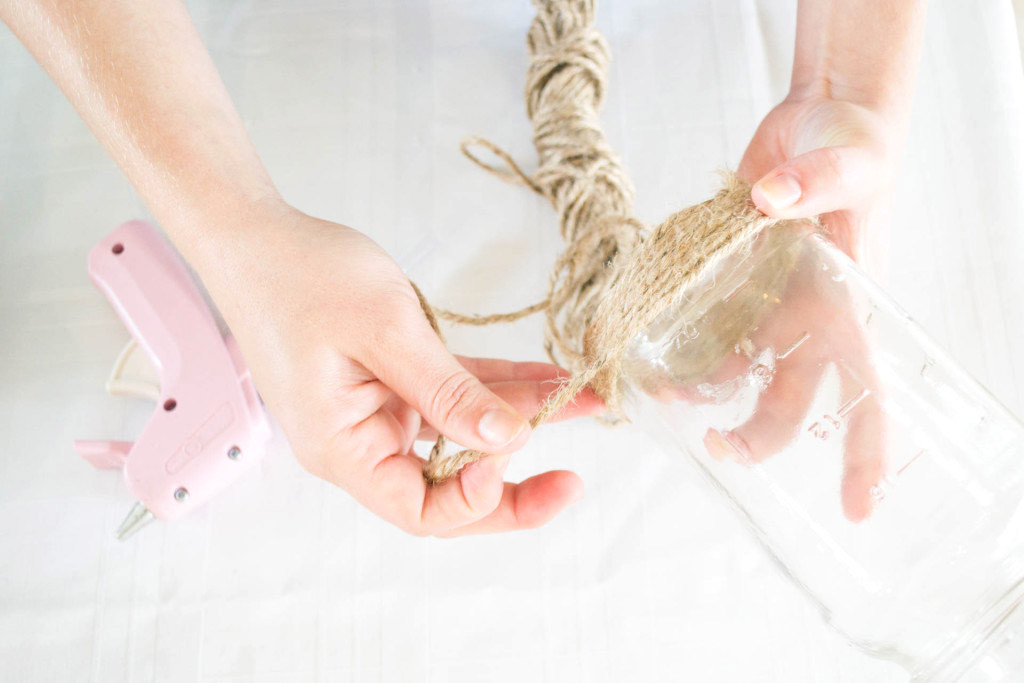
Last but not least, recycle an old mason jar and turn it into a vase! Wash it, remove any sticker/brand residue and add a rustic look by wrapping twine at the bottom of the jar. Use the hot glue gun to adhere the twine in place.
And to think that my fun-filled day of crafts and creativity started when I bought the Glade® Radiant Berries™ candle and PlugIns® Scented Oil? Funny how a little crafting can make you feel bright.
What inspires you? Tell us, what gives you the extra pizzazz you need? 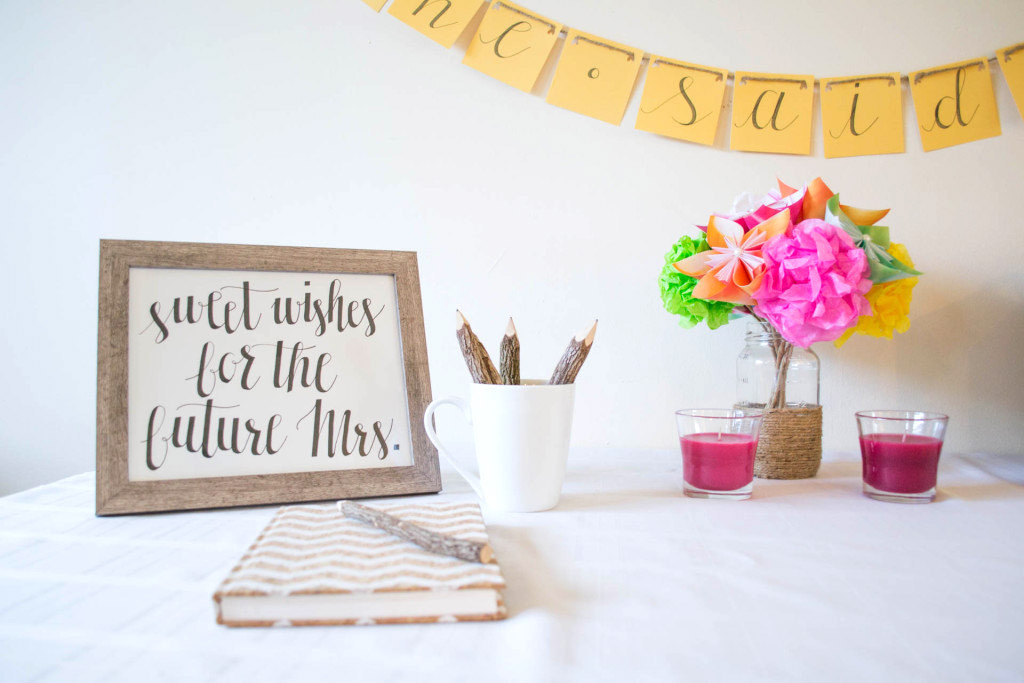
Hope you enjoyed the craft! Thanks for joining in on the fun. Feel Bright. Feel Glade®
What a cool DIY love the colors and how easy it looks to make thanks for yoru participation in this shop #client
My pleasure! I had so much fun being a part of it. :)
[…] holiday spirit. You should also focus on your dining area, perhaps with festive variations of our DIY origami flowers on your table, as well as Christmas candles, twigs of holly, and festive-themed linens. Brighten […]